> ## Documentation Index
> Fetch the complete documentation index at: https://docs.phidata.com/llms.txt
> Use this file to discover all available pages before exploring further.
# CI/CD
Phidata templates come pre-configured with [Github Actions](https://docs.github.com/en/actions) for CI/CD. We can
1. [Test and Validate on every PR](#test-and-validate-on-every-pr)
2. [Build Docker Images with Github Releases](#build-docker-images-with-github-releases)
3. [Build ECR Images with Github Releases](#build-ecr-images-with-github-releases)
## Test and Validate on every PR
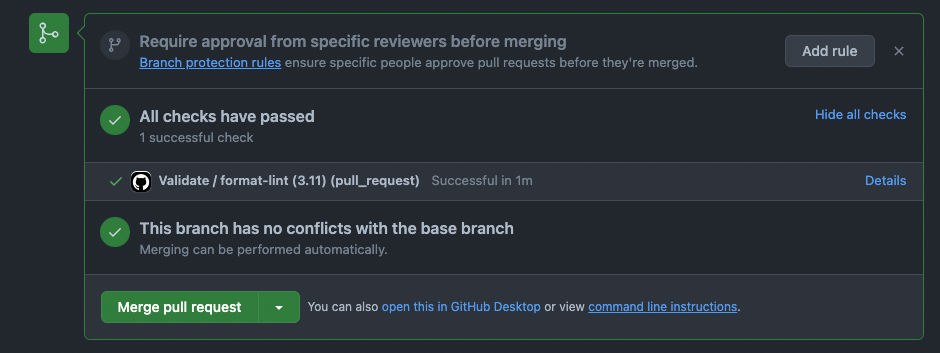
Whenever a PR is opened against the `main` branch, a validate script runs that ensures
1. The changes are formatted using ruff
2. All unit-tests pass
3. The changes don't have any typing or linting errors.
Checkout the `.github/workflows/validate.yml` file for more information.
 ## Build Docker Images with Github Releases
If you're using [Dockerhub](https://hub.docker.com/) for images, you can buld and push the images throug a Github Release. This action is defined in the `.github/workflows/docker-images.yml` file.
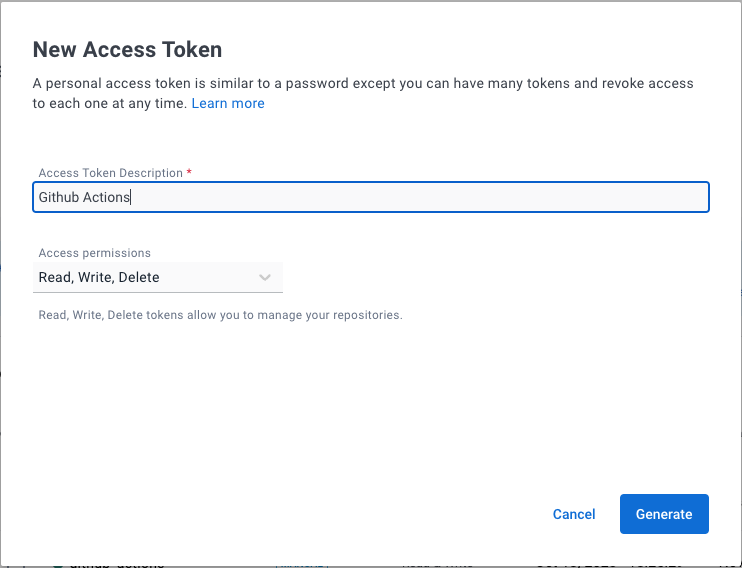
1. Create a [Docker Access Token](https://hub.docker.com/settings/security) for Github Actions
## Build Docker Images with Github Releases
If you're using [Dockerhub](https://hub.docker.com/) for images, you can buld and push the images throug a Github Release. This action is defined in the `.github/workflows/docker-images.yml` file.
1. Create a [Docker Access Token](https://hub.docker.com/settings/security) for Github Actions
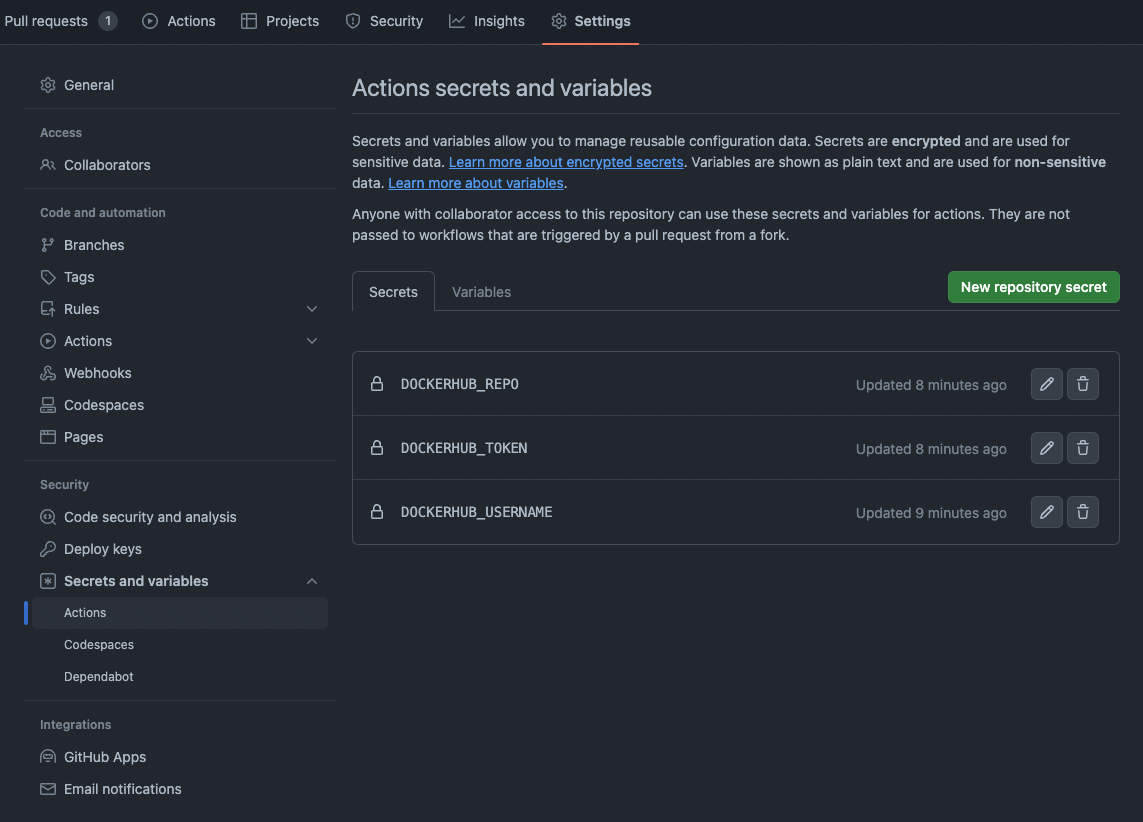
 2. Create secret variables `DOCKERHUB_REPO`, `DOCKERHUB_TOKEN` and `DOCKERHUB_USERNAME` in your github repo. These variables are used by the action in `.github/workflows/docker-images.yml`
 3. Run workflow using a Github Release
This workflow is configured to run when a release is created. Create a new release using:
Confirm the image name in the `.github/workflows/docker-images.yml` file before running
```bash Mac theme={null}
gh release create v0.1.0 --title "v0.1.0" -n ""
```
```bash Windows theme={null}
gh release create v0.1.0 --title "v0.1.0" -n ""
```
3. Run workflow using a Github Release
This workflow is configured to run when a release is created. Create a new release using:
Confirm the image name in the `.github/workflows/docker-images.yml` file before running
```bash Mac theme={null}
gh release create v0.1.0 --title "v0.1.0" -n ""
```
```bash Windows theme={null}
gh release create v0.1.0 --title "v0.1.0" -n ""
```
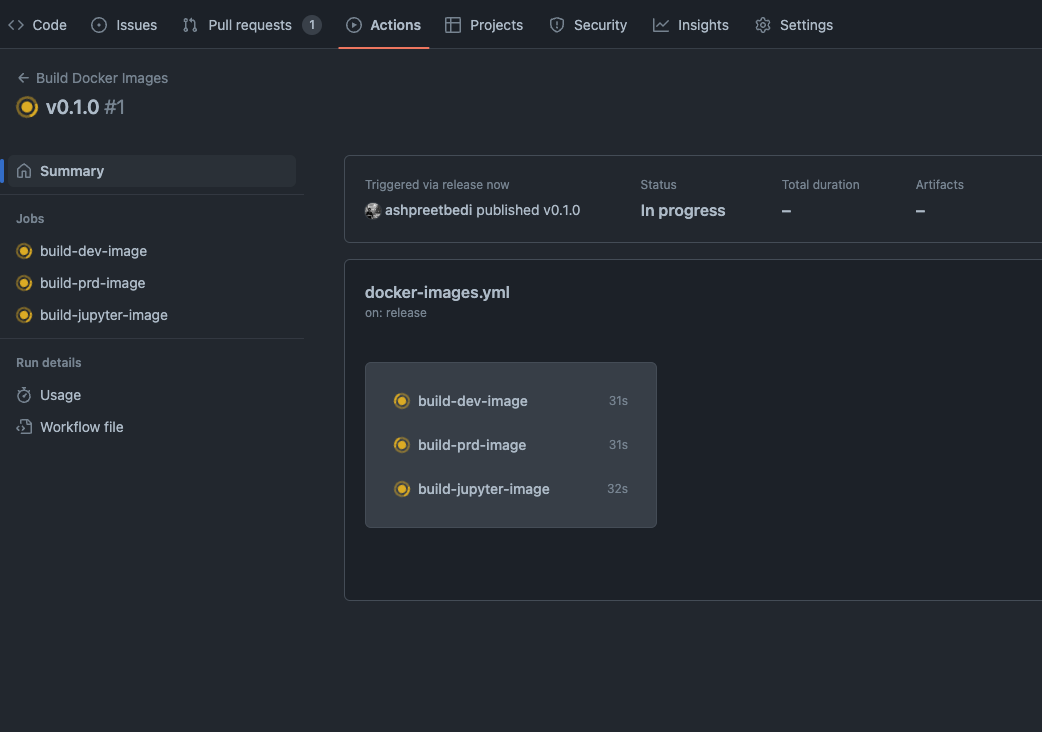 You can also run the workflow using `gh workflow run`
## Build ECR Images with Github Releases
If you're using ECR for images, you can buld and push the images through a Github Release. This action is defined in the `.github/workflows/ecr-images.yml` file and uses the new OpenID Connect (OIDC) approach to request the access token, without using IAM access keys.
We will follow this [guide](https://aws.amazon.com/blogs/security/use-iam-roles-to-connect-github-actions-to-actions-in-aws/) to create an IAM role which will be used by the github action.
1. Open the IAM console.
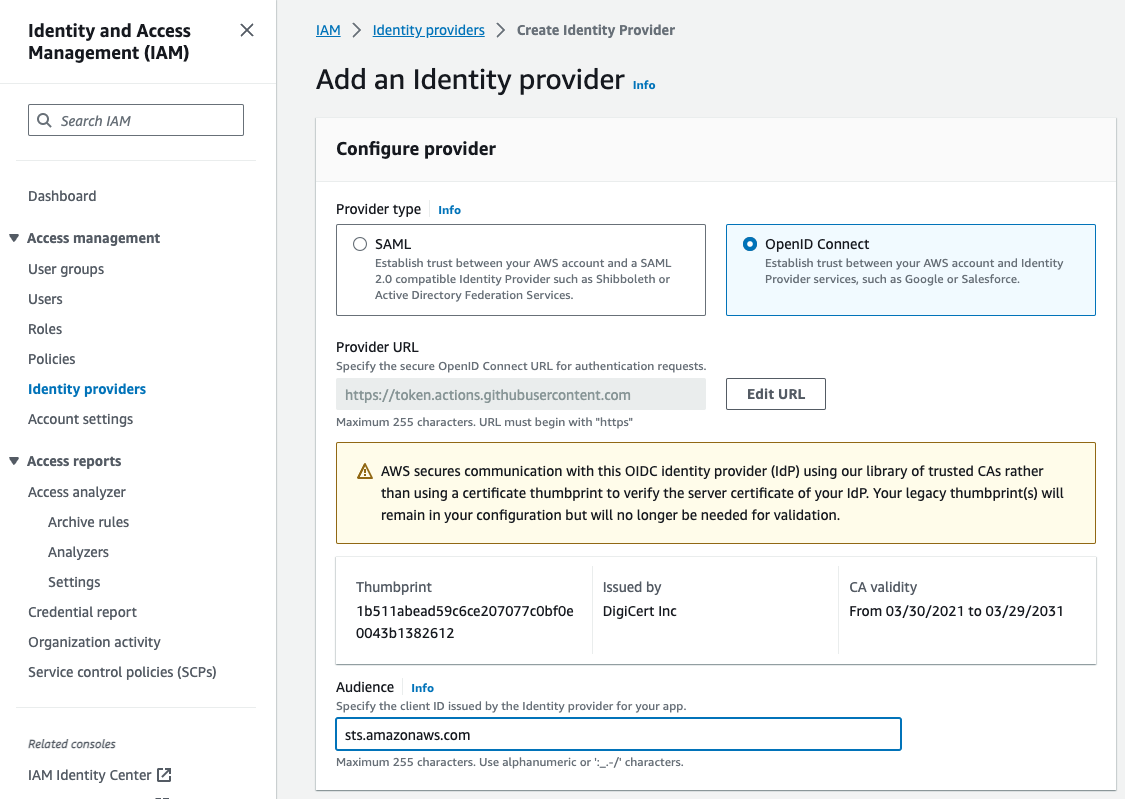
2. In the left navigation menu, choose Identity providers.
3. In the Identity providers pane, choose Add provider.
4. For Provider type, choose OpenID Connect.
5. For Provider URL, enter the URL of the GitHub OIDC IdP: [https://token.actions.githubusercontent.com](https://token.actions.githubusercontent.com)
6. Get thumbprint to verify the server certificate
7. For Audience, enter sts.amazonaws.com.
Verify the information matches the screenshot below and Add provider
You can also run the workflow using `gh workflow run`
## Build ECR Images with Github Releases
If you're using ECR for images, you can buld and push the images through a Github Release. This action is defined in the `.github/workflows/ecr-images.yml` file and uses the new OpenID Connect (OIDC) approach to request the access token, without using IAM access keys.
We will follow this [guide](https://aws.amazon.com/blogs/security/use-iam-roles-to-connect-github-actions-to-actions-in-aws/) to create an IAM role which will be used by the github action.
1. Open the IAM console.
2. In the left navigation menu, choose Identity providers.
3. In the Identity providers pane, choose Add provider.
4. For Provider type, choose OpenID Connect.
5. For Provider URL, enter the URL of the GitHub OIDC IdP: [https://token.actions.githubusercontent.com](https://token.actions.githubusercontent.com)
6. Get thumbprint to verify the server certificate
7. For Audience, enter sts.amazonaws.com.
Verify the information matches the screenshot below and Add provider
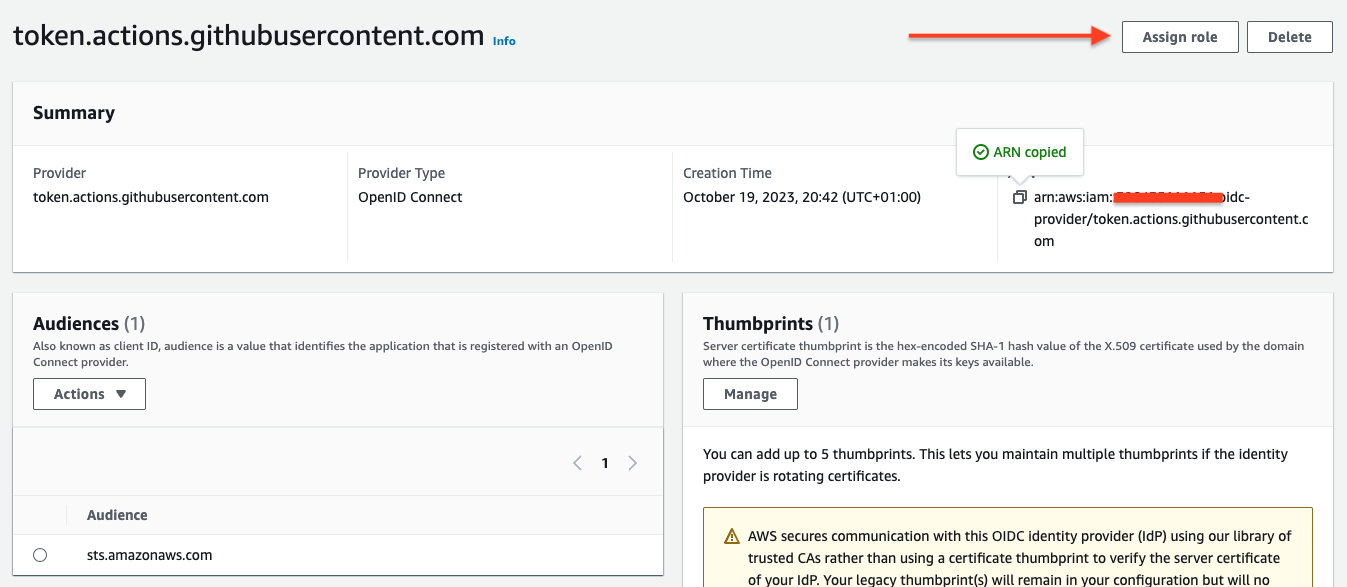
 8. Assign a Role to the provider.
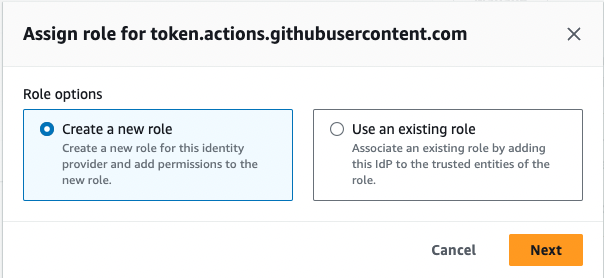
 9. Create a new role.
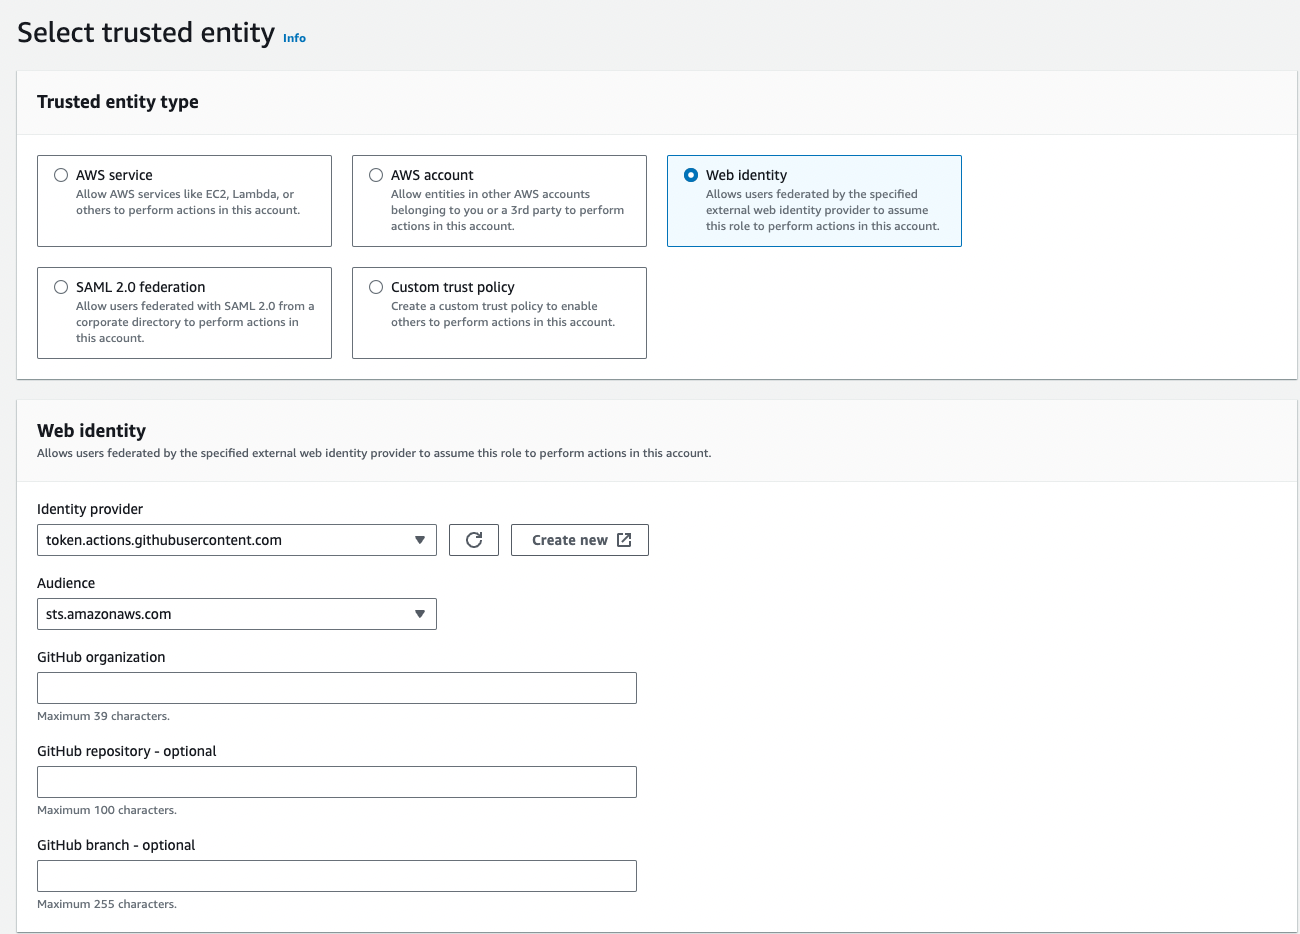
 10. Confirm that Web identity is already selected as the trusted entity and the Identity provider field is populated with the IdP. In the Audience list, select sts.amazonaws.com, and then select Next.
 11. Add the `AmazonEC2ContainerRegistryPowerUser` permission to this role.
12. Create the role with the name `GithubActionsRole`.
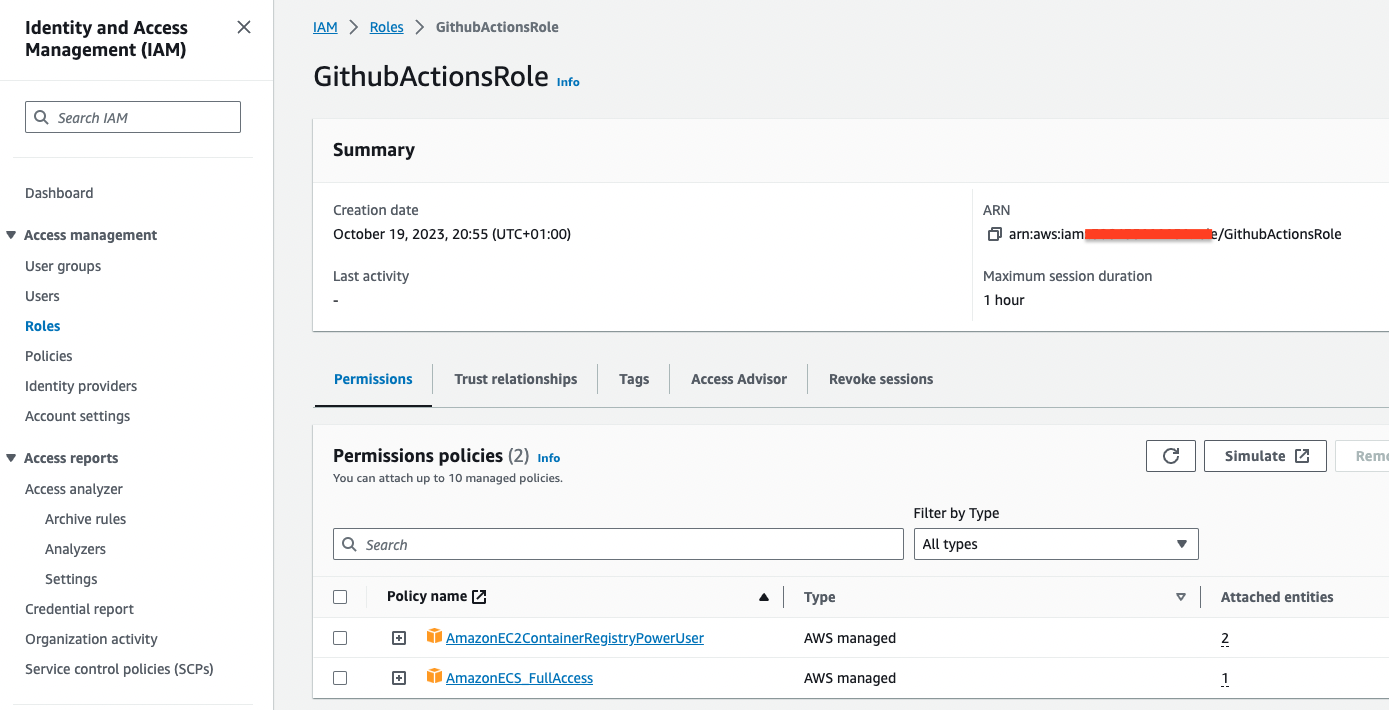
13. Find the role `GithubActionsRole` and copy the ARN.
11. Add the `AmazonEC2ContainerRegistryPowerUser` permission to this role.
12. Create the role with the name `GithubActionsRole`.
13. Find the role `GithubActionsRole` and copy the ARN.
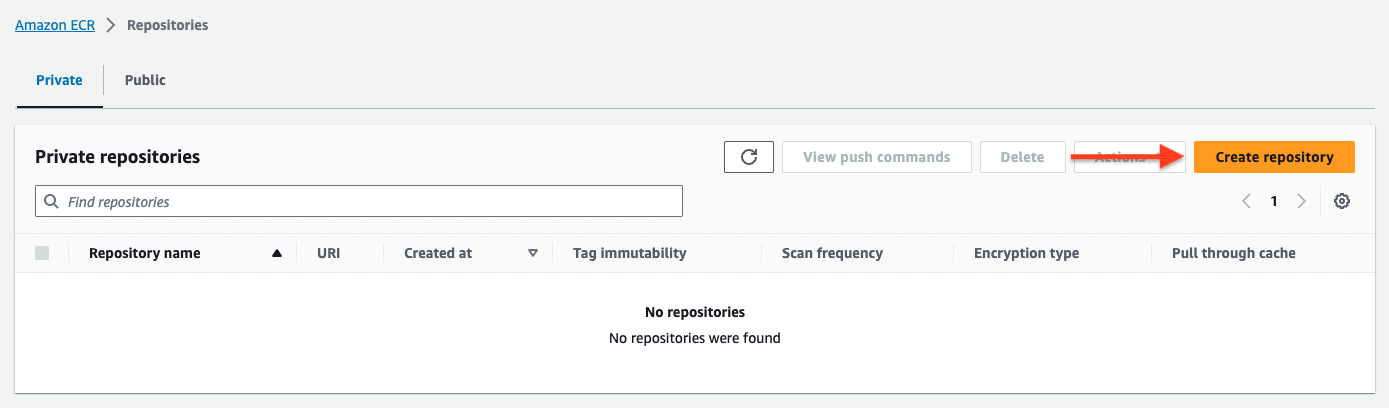
 14. Create the ECR Repositories: `llm` and `jupyter-llm` which are built by the workflow.
 15. Update the workflow with the `GithubActionsRole` ARN and ECR Repository.
```yaml .github/workflows/ecr-images.yml theme={null}
name: Build ECR Images
on:
release:
types: [published]
permissions:
# For AWS OIDC Token access as per https://docs.github.com/en/actions/deployment/security-hardening-your-deployments/configuring-openid-connect-in-amazon-web-services#updating-your-github-actions-workflow
id-token: write # This is required for requesting the JWT
contents: read # This is required for actions/checkout
env:
ECR_REPO: [YOUR_ECR_REPO]
# Create role using https://aws.amazon.com/blogs/security/use-iam-roles-to-connect-github-actions-to-actions-in-aws/
AWS_ROLE: [GITHUB_ACTIONS_ROLE_ARN]
AWS_REGION: us-east-1
```
16. Update the `docker-images` workflow to **NOT** run on a release
```yaml .github/workflows/docker-images.yml theme={null}
name: Build Docker Images
on: workflow_dispatch
```
17. Run workflow using a Github Release
```bash Mac theme={null}
gh release create v0.2.0 --title "v0.2.0" -n ""
```
```bash Windows theme={null}
gh release create v0.2.0 --title "v0.2.0" -n ""
```
15. Update the workflow with the `GithubActionsRole` ARN and ECR Repository.
```yaml .github/workflows/ecr-images.yml theme={null}
name: Build ECR Images
on:
release:
types: [published]
permissions:
# For AWS OIDC Token access as per https://docs.github.com/en/actions/deployment/security-hardening-your-deployments/configuring-openid-connect-in-amazon-web-services#updating-your-github-actions-workflow
id-token: write # This is required for requesting the JWT
contents: read # This is required for actions/checkout
env:
ECR_REPO: [YOUR_ECR_REPO]
# Create role using https://aws.amazon.com/blogs/security/use-iam-roles-to-connect-github-actions-to-actions-in-aws/
AWS_ROLE: [GITHUB_ACTIONS_ROLE_ARN]
AWS_REGION: us-east-1
```
16. Update the `docker-images` workflow to **NOT** run on a release
```yaml .github/workflows/docker-images.yml theme={null}
name: Build Docker Images
on: workflow_dispatch
```
17. Run workflow using a Github Release
```bash Mac theme={null}
gh release create v0.2.0 --title "v0.2.0" -n ""
```
```bash Windows theme={null}
gh release create v0.2.0 --title "v0.2.0" -n ""
```
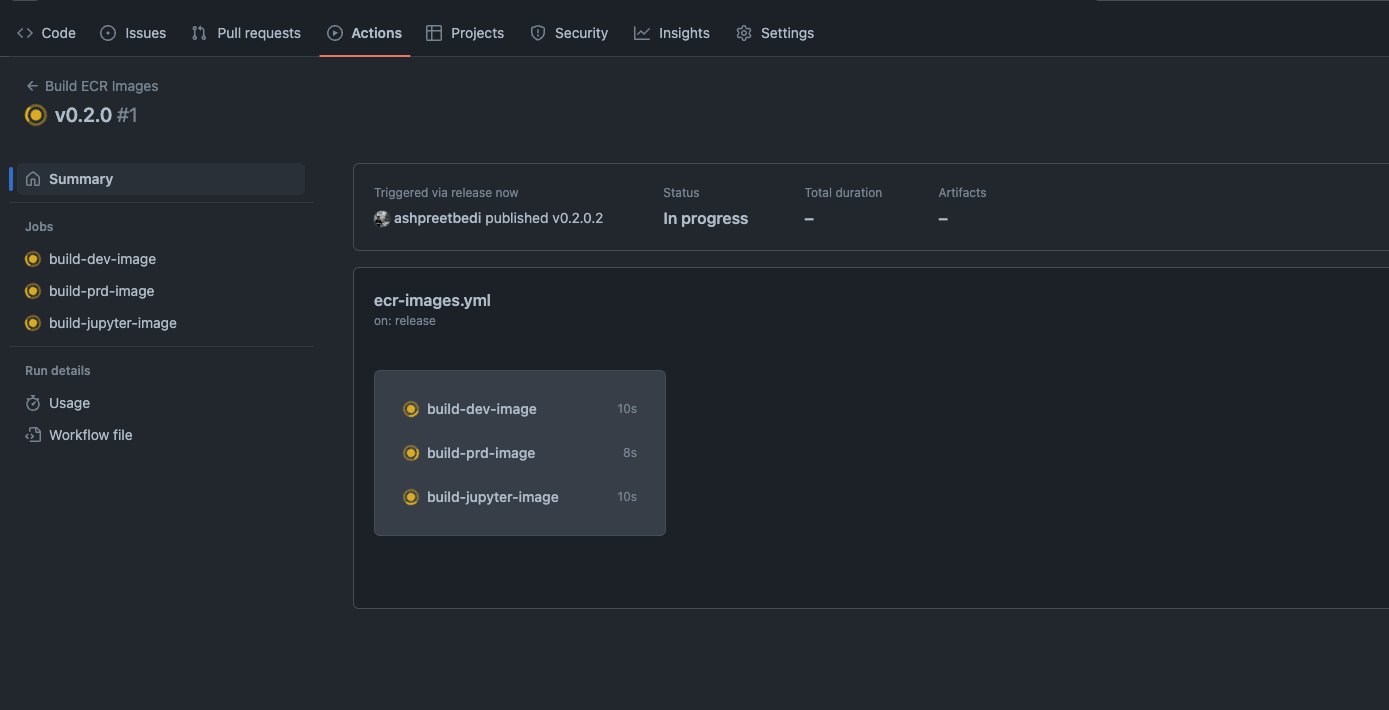 You can also run the workflow using `gh workflow run`