Django is an exceptional choice for building a full-stack Web App in 2024. It stands apart from typical hype cycles and is known for its maturity and stability. Combined with tailwindcss it truly is one of our favourite frameworks.

The django-app template gives you a full-stack Web App built with Django and Postgres

Setup

1

Create a virtual environment

Open the Terminal and create a python virtual environment.

python3 -m venv ~/.venvs/aienv
source ~/.venvs/aienv/bin/activate
2

Install phidata

Install phidata using pip

pip install -U "phidata[aws]"
3

Install docker

Install docker desktop to run your app locally

Create your codebase

Create your codebase using the django-app template pre-configured with Django and PostgreSQL

phi ws create -t django-app -n django-app

This will create a folder named django-app with the following structure:

django-app                  # root directory for your django-app
├── app                   # directory for the Jjango project
├── nginx                 # directory for nginx used in production for static files
├── manage.py             # django-admin file
├── dev.Dockerfile        # Dockerfile for the dev application
├── prd.Dockerfile        # Dockerfile for the production application
├── pyproject.toml        # python project definition
├── requirements.txt      # python dependencies generated by pyproject.toml
├── scripts               # directory for helper scripts
├── tests                 # directory for unit tests
└── workspace             # phidata workspace directory
    ├── dev_resources.py  # dev resources running locally
    ├── prd_resources.py  # production resources running on AWS
    ├── secrets           # directory for storing secrets
    └── settings.py       # phidata workspace settings

Set OpenAI Key

Set your OPENAI_API_KEY as an environment variable. You can get one from OpenAI.

export OPENAI_API_KEY=sk-***

Local Web App

Your codebase comes with a pre-configured Django application connected to a Postgres database. Run it using:

phi ws up

Press Enter to confirm and give a few minutes for the image to download (only the first time). Verify container status and view logs on the docker dashboard.

View your Django App

Open localhost:8000 to view the Django App running locally.

django-app-django-local

Django Admin

Open localhost:8000/admin to view the Django admin site. Create an admin user by running:

docker exec -it django-dev-app python manage.py createsuperuser

Log in to the admin panel:

django-app-django-admin-local

Build your Web App

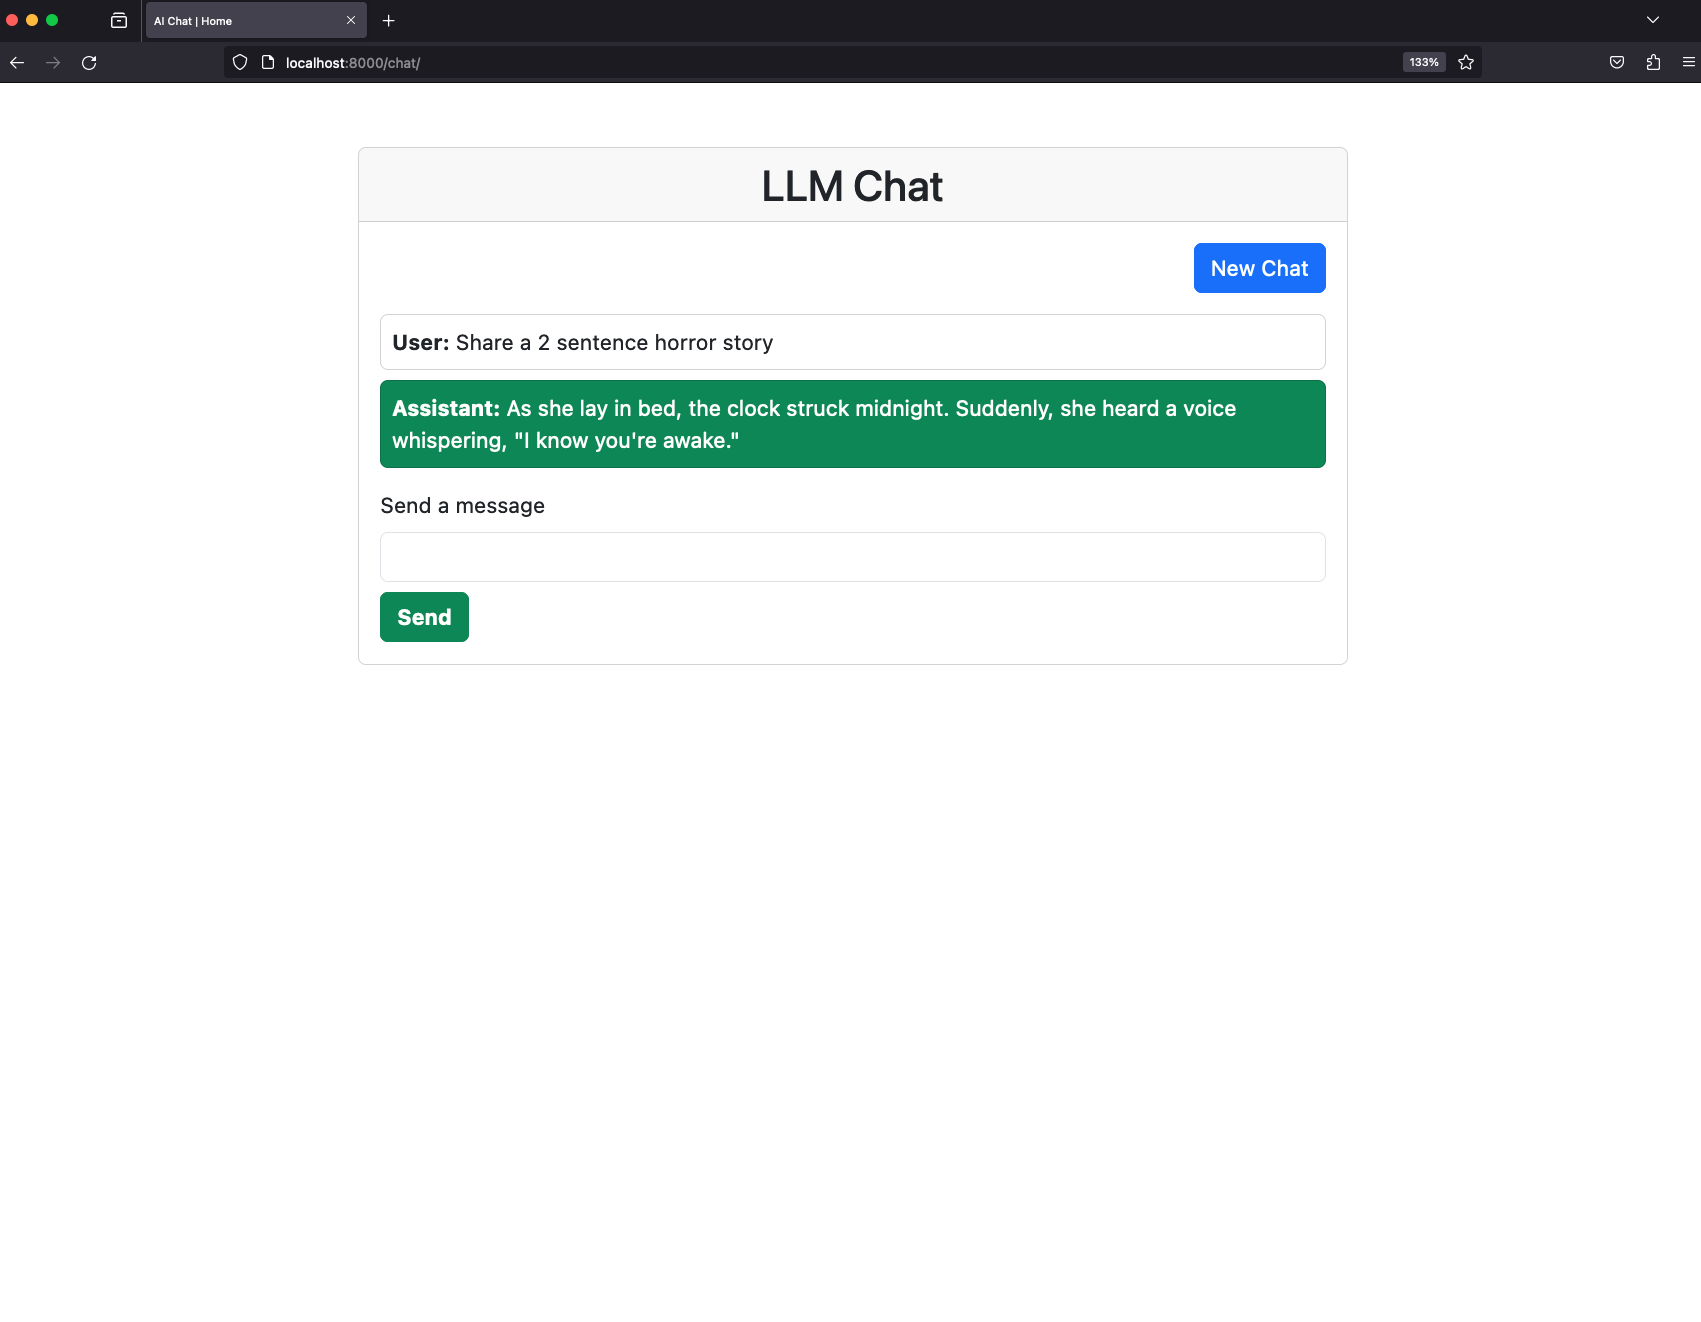
The Django Tutorials are a great place to learn about Django, play around and update your Web App to your use case. Here's how to create a simple chat application:

1. Create a new django app

docker exec -it django-dev-app python manage.py startapp chat

Read more about django apps here

2. Register the chat app

Update the 'app/settings.py' file and register the chat

app/settings.py
...
INSTALLED_APPS = [
    "django.contrib.admin",
    "django.contrib.auth",
    "django.contrib.contenttypes",
    "django.contrib.sessions",
    "django.contrib.messages",
    "django.contrib.staticfiles",
    # register the chat app
    'chat',
]
...

3. Create views for the chat app

Update the chat/views.py file to

chat/views.py
from django.shortcuts import render, redirect

from phi.assistant import Assistant

def index(request):
    try:
        # Create a assistant
        assistant = Assistant()
        if 'messages' not in request.session:
            request.session['messages'] = []
        if request.method == 'POST':
            prompt = request.POST.get('prompt')
            # Add the prompt to the messages
            request.session['messages'].append({"role": "user", "content": prompt})
            # Set the session as modified
            request.session.modified = True
            # Create a response
            response = assistant.run(prompt, stream=False)
            # Append the response to the messages
            request.session['messages'].append({"role": "assistant", "content": response})
            # Set the session as modified
            request.session.modified = True
            # Redirect to the home page
            context = {
                'messages': request.session['messages'],
                'prompt': '',
            }
            return render(request, 'chat/index.html', context)
        else:
            context = {
                'messages': request.session['messages'],
                'prompt': '',
            }
            return render(request, 'chat/index.html', context)
    except Exception as e:
        print(e)
        return redirect('index')


def new_chat(request):
    # -*- Clears the session messages and redirects to the home page -*-
    request.session.pop('assistant', None)
    request.session.pop('messages', None)
    return redirect('index')

4. Configure URLs

Create a file named urls.py in the chat folder:

chat/urls.py
from django.urls import path
from . import views

urlpatterns = [
    path('', views.index, name='index'),
    path('new_chat/', views.new_chat, name='new_chat'),
]

Update the app/urls.py file to:

app/urls.py
from django.contrib import admin
from django.urls import include, path

urlpatterns = [
    path("admin/", admin.site.urls),
    path('chat/', include('chat.urls')),
]

5. Create templates

Create the HTML templates for the chat interface in the chat/templates/chat folder.

chat/templates/chat/base.html
<!DOCTYPE html>
<html lang="en">
<head>
    <meta charset="UTF-8">
    <meta http-equiv="X-UA-Compatible" content="IE=edge">
    <meta name="viewport" content="width=device-width, initial-scale=1.0">
    <title>AI Chat | {% block title %}  {% endblock %}</title>
    <link href="https://cdn.jsdelivr.net/npm/bootstrap@5.3.0-alpha1/dist/css/bootstrap.min.css" rel="stylesheet">
</head>
<body>
    {% block content %}
    {% endblock %}
</body>
</html>
chat/templates/chat/index.html
{% extends 'chat/base.html' %}
{% block title %} Home {% endblock %}
{% block content %}
<div class="row justify-content-center my-4">
    <div class="col-md-7 mt-4">
        <div class="card">
            <h2 class="card-header text-center">LLM Chat</h2>
            <div class="card-body">
              <div class="d-flex justify-content-end">
                <button type="button" class="btn btn-primary mb-3" onclick="location.href='{% url 'new_chat' %}'">New Chat</button>
              </div>
              <div class="chat-history mb-3">
                {% for message in messages %}
                  <div class="card mb-2 {% if message.role == 'assistant' %}bg-success text-white{% endif %}">
                    <div class="card-body p-2">
                      <strong>{{ message.role|title }}:</strong> {{ message.content|linebreaksbr }}
                    </div>
                  </div>
                {% endfor %}
              </div>
              <form action="." method="POST">
                <!-- this secures the form from malicious attacks during submission -->
                {% csrf_token %}
                <label for="prompt" class="form-label">Send a message</label>
                <input class="form-control mb-2" required type="text" autofocus="autofocus" name="prompt" value="{{ prompt }}" id="">
                <button class="btn btn-success fw-bold" type="submit">
                  Send
                </button>
              </form>
            </div>
        </div>
    </div>
</div>
{% endblock %}

6. Open Django App

Open localhost:8000/chat/ to view the LLM chat app.

django-app-chat-app

If needed, restart the django server using phi ws restart dev:docker:app -y

Delete local resources

Play around and stop the workspace using:

phi ws down

Next

Congratulations on running your Django App locally. Next Steps: